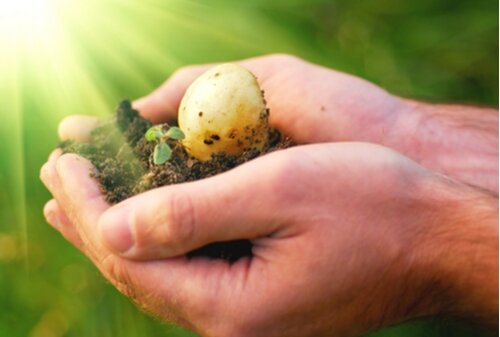
Potatoes are one of the easiest vegetables to grow, but rather than planting them from seeds produced by the flowers of the plant, they are generally grown by planting portions of the root structure, known as seed potatoes. Growing Seed Potatoes is much more successful and for most home gardeners easier than growing from seeds.
So what are Seed potatoes exactly?
Though its name may be misleading, seed potatoes aren't actually seeds; they're tubers that you can use to grow new potatoes that will be genetically exactly the same as the parent potato. Similar to any other seed, seed potatoes are potatoes whose purpose is to be replanted and eventually produce more potatoes.
When is the best time to plant seed potatoes
Potatoes love the sun and they do best in full sunshine! They can be planted in the early spring two to four weeks prior to the expected last frost date in your area. Seed potatoes planted in soil that is too cold or soggy may rot easily. Generally, potatoes will not grow until the soil temperature has reached at least 5 degrees Celsius. You can plant a second crop as late as mid-june and harvest the potatoes as late as possible. Potato plants will tolerate a light frost, but protect plants from freezes with row covers, or harvest them before a freeze arrives.
Creating the best conditions for Seed Potatoes
Potatoes are aggressively rooting plants and will produce the best crop when you plant them in a light, loose and well-drained soil. Seed potatoes prefer a slightly acid soil with a pH of 5.0 to 7.0 acidic to neutral. However, potatoes are profuse growers and usually adapt to poor soil and climate conditions when needed. Make sure to rotate where you plant potatoes in the garden, as diseases can linger in the ground and affect future crops. Before you plant, you may also decide to "chit" (pre-sprout) the seed potatoes. If you decide to encourage stem growth on your potatoes, this process will add two to four weeks to the process but many gardeners find that chitting potatoes produces a quicker, slightly larger potato.
Jones personal instructions for planting your Seed potatoes
1.Chit the Potatoes (preferably but optional!)
Even though potatoes will sprout in the dark, you will get long, pale shoots that easily break. For strong healthy shoots; place them in a cool spot with bright light for 2 to 4 weeks. This way, the sprouts will grow stocky, sturdy, and dark green. This process is also called greening. You can place your seed potatoes upright in an egg carton or box, on a tray, or screen with the majority of buds ("eyes") facing up. Do not pile them on top of each other. You can start this process one month before your outdoor planting date.
2.Plant the Sprouted Potatoes
Plant the potatoes as soon as the sprouts are one to two cm long. Handle the seed potatoes with care, so the sprouts don't become damaged or break off. Plant with the sprouts facing up and cover lightly with soil.
3. Plant your Seed potatoes in Rows
Potatoes grow best planted in rows spaced about a meter apart. Dig a trench 15 to 20 cm deep. Place cut side down, with eyes facing up. Space the seed potatoes about 30 cm apart. Fill the trench with 10 cm of soil. As the plants grow, add more soil, mounding it up around the plants.
4. Water your Seed potatoes well
Keep potatoes well-watered throughout summer, especially when flowering. During flowering, the plants begin to create the tubers (the edible potatoes) Potatoes need 3 to 5 cm of water per week to produce well.
5. Harvest the Mature Potatoes
When foliage turns yellow,stop watering to begin the curing process for harvesting. You can harvest potatoes two to three weeks after flowering ceases. Dig around the plants carefully to remove new potatoes for fresh eating, and leave the smaller potatoes to continue growing. For potatoes you plan to store, harvest the crop two to three weeks after the foliage dies back. Carefully loosen the potatoes with a garden fork and remove them from the bed. If the weather is dry, leave the potatoes in the garden, unwashed, for two to three days to cure, or move them to a bit more protected area, such as a garage or shed, to cure.
Tips for the most tasteful Seed potatoes
- You do not have to chit the potatoes to get a good crop. But you might want to chit your potatoes if you notice them beginning to sprout or if you want an earlier harvest date.
- When planting whole seed potatoes or pieces of potatoes, in general, more eyes per piece equals more potatoes. Smaller potatoes with one or two eyes per piece mean fewer potatoes, but they will be larger.
- If you have to postpone planting because of the weather or other reason, move the seed potatoes to a cooler spot to slow down their growth. Don't wait too long; the potatoes may start to dehydrate and shrivel.
-
Potatoes also perform well in grow bags, which is a good alternative if you have issues with voles in the garden. Fill a grow bag halfway with potting mix, plant the seed potatoes, and continue to add more soil to the bag as the potatoes grow. To harvest, spread out a tarp or sheet, and dump the bag. Kids especially enjoy sorting through the bag to find potatoes!
Seed potatoes at Jones Garden Centre
At Jones Garden Centre we have all the knowlegde to help you grow your own tasty Seed potatoes! Come visit our garden center where you'll find a wide range of potatoes to choose from. Pick your favorite potatoes from our webshop and have them delivered to your home! Have questions regarding planting seed potatoes? Give us a call or come by and ask our staff!